Marker
Use QR, barcodes, NFC, iBeacon, and more to identify your places and objects.
Markers are the glue of your location-based project that identifies places or objects.
Rather than having URLs identify content (pages), at xamoom, they identify spots. This offers much greater flexibility since the page can change at any location or object in real-time without changing the URL at all. This means that you do not have to replace smart labels or reconfigure beacons.
Every xamoom system has these markers pre-generated.
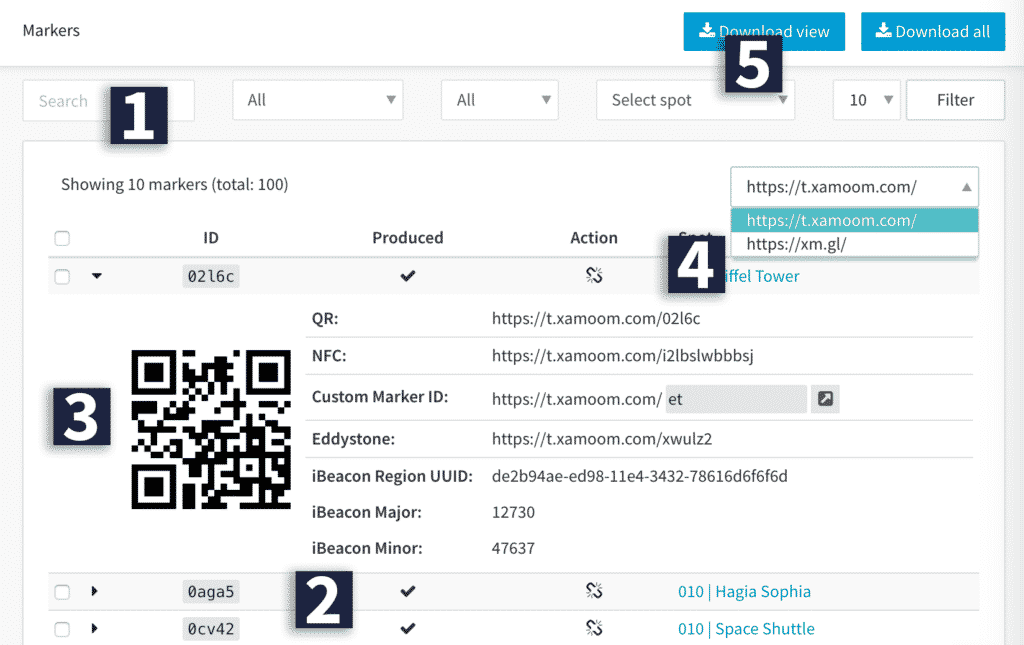
The marker list
1. Search and filter:
You can search for a specific marker using its ID. As an example: for the URL m.pingeb.org/xyz12, the identifier (ID) is called xyz12.
Filters are available for the marker’s status (already been produced or has a spot) or the spot’s name.
2. List of markers:
Items in the markers’ list can be expanded using the little triangle icon. At a glance, you see if a marker has already been used to generate a smart label (produced checkmark or not produced cross).
Attention: Use the produced/not produced feature to keep track of the URL set you have available. It saves you from a lot of headaches later on.
Using the link icon, you can link a marker to a spot. If already connected to a spot, you can unlink the marker using the unlink icon.
3. Marker detail:
You can now scan the QR code to get a feeling for the end user’s experience. Be aware that if you haven’t yet connected a marker to a spot and the spot to a page, this will result in an error. By clicking on the URLs and IDs, you can copy them to the clipboard.
You can also issue your custom markers. These keywords can be chosen freely and can thus be easily memorable and typeable, while you can still change the page behind a spot. They are also used for the IDs that you will subsequently generate barcodes from. To add your custom marker ID, type it into the field and press enter.
4. URL selector:
You can select the URL you want to use: xm.gl for concise URLs and coarse QR codes, or you can use your own domain (e.g., m.domain.com).
5. Marker download:
You can either download a list of all or markers or those shown in the current list. The result is a CSV file that you can either open in Microsoft Excel or Adobe InDesign to produce smart labels.

Assigning a Marker to a Spot
Every spot will get one marker automatically assigned to it. However, you can attach multiple markers to one spot.
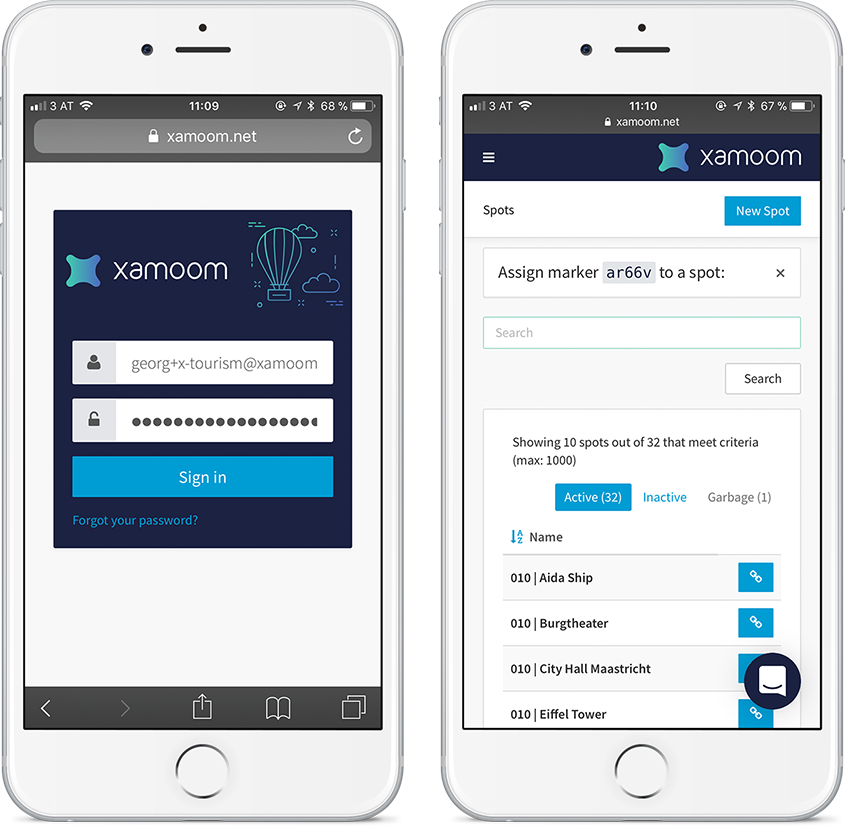
A marker is connected/linked to a spot with a click on the link icon (chain). Subsequently, you search and choose the marker in the list. Finish with the Assign button.
If you have already batch-produced smart labels you can do this using the QR code or NFC tag on the phone. Just scan an unassigned smart label. Your browser will ask you to log in first, and then you can search for the spot.